

Elevating Voiceovers with Studio Recording Practices
- Guy Slocombe
- Feb 4
- 4 min read
When it comes to voiceovers, quality is king. Whether it’s a commercial, an e-learning module, or a video game, the voice needs to sound crisp, clear, and engaging. But how do you achieve that professional polish? The answer lies in mastering studio recording practices. I’ve spent years honing these techniques, and today, I want to share the secrets that can elevate your voiceover work to the next level.
Why Studio Recording Practices Matter
You might wonder, “Isn’t a good microphone enough?” Not quite. The microphone is just one piece of the puzzle. Studio recording practices encompass everything from the environment you record in to how you position yourself and handle the equipment. These practices ensure your voice sounds natural, powerful, and free from distractions.
For example, recording in a room with poor acoustics can add unwanted echoes or background noise. Using a pop filter incorrectly can cause plosives to sneak into your audio. Even your posture affects your vocal delivery. When you get these details right, your recordings become more professional and easier to work with during post-production.

Key Studio Recording Practices for Voiceovers
Let’s break down the essentials that make a difference:
1. Soundproofing and Acoustic Treatment
A quiet room is your best friend. Soundproofing stops external noises like traffic or air conditioning from creeping into your recording. Acoustic treatment, such as foam panels or bass traps, controls reflections and echoes inside the room. This creates a clean, dry sound that’s perfect for voiceovers.
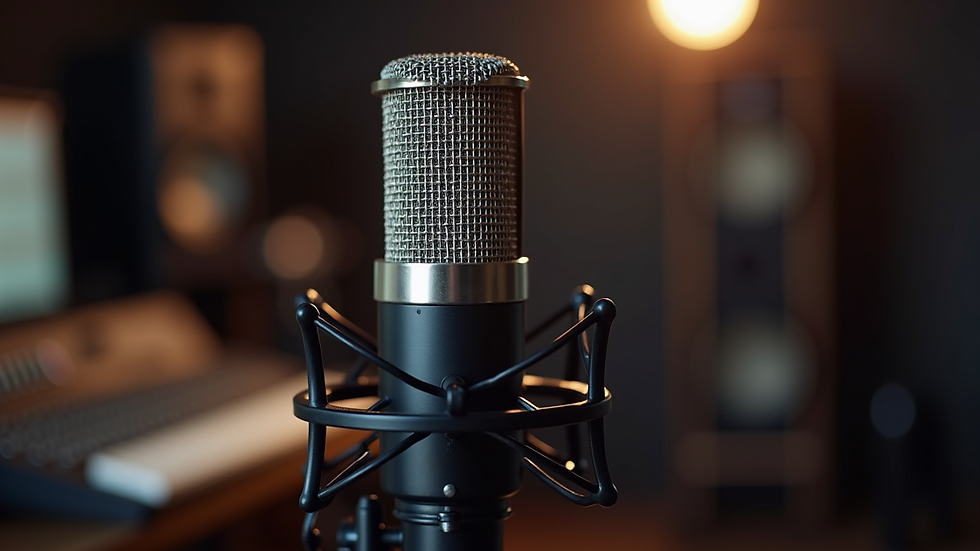
2. Microphone Choice and Placement
Choosing the right microphone depends on your voice and the style of the project. Condenser mics are popular for their sensitivity and clarity. Position the mic about 6-12 inches from your mouth, slightly off-axis to reduce plosives. Use a shock mount to minimise vibrations and a pop filter to soften harsh consonants.
3. Monitoring and Levels
Always monitor your recording with good headphones. This helps you catch issues like clipping or background noise in real-time. Keep your input levels balanced - not too low to avoid hiss, and not too high to prevent distortion. Aim for peaks around -12dB to -6dB on your recording software.
4. Vocal Warm-ups and Hydration
Your voice is an instrument. Warm it up before recording with simple exercises like humming or lip trills. Stay hydrated to keep your vocal cords flexible. Avoid caffeine or dairy right before sessions as they can affect your voice quality.
5. Consistency in Delivery
Maintain consistent distance from the mic and keep your tone steady. This helps with editing and ensures the final product sounds uniform. If you need to record over multiple sessions, take notes on your setup and vocal style to replicate the same conditions.
The Role of Technology in Studio Recording Practices
Technology has transformed how we approach voiceover recording. Digital audio workstations (DAWs) like Pro Tools or Audacity offer powerful tools for editing and enhancing audio. But technology alone won’t fix poor recording habits.
For instance, noise reduction plugins can help clean up background hum, but they can also degrade the natural tone if overused. It’s better to capture the cleanest sound possible at the source. Using high-quality preamps and audio interfaces also improves signal clarity and reduces latency.

Practical Tips to Implement Studio Recording Practices Today
Ready to upgrade your voiceover recordings? Here are some actionable steps:
Invest in basic acoustic treatment: Even DIY solutions like heavy curtains or bookshelves can reduce room reflections.
Test different mic placements: Record short clips moving the mic slightly to find the sweet spot for your voice.
Use a pop filter: It’s a small investment that makes a big difference in reducing harsh sounds.
Record test samples: Listen back critically and adjust your setup before the actual session.
Keep a recording log: Note your settings, room conditions, and vocal state to maintain consistency.
Stay relaxed and breathe properly: Tension affects your voice, so take breaks and practice good breathing techniques.
Why Professional Voiceovers Demand Studio Recording Standards
Clients expect top-tier audio quality. When you follow studio recording practices, you deliver a product that stands out. This is especially important for brands aiming to connect with global audiences. Clear, engaging voiceovers build trust and enhance the overall media experience.
For example, in video games, a well-recorded voiceover can bring characters to life and immerse players in the story. In e-learning, clarity ensures learners understand the content without distraction. Advertising agencies rely on crisp voiceovers to make their messages memorable.
By adopting these standards, you position yourself as a reliable partner for high-profile projects. This aligns perfectly with the goal of becoming the top choice for clients needing a professional British voiceover, consistently delivering high-quality, engaging audio for diverse media projects.
Taking Your Voiceovers to the Next Level
Mastering studio recording practices is a journey, not a one-time fix. Keep experimenting, learning, and refining your craft. Surround yourself with the right tools and environment. And remember, the best recordings come from a blend of technical skill and genuine performance.
If you want to explore more about professional voiceover techniques or need a British voiceover artist who understands these standards, check out Guy Voiceover. Their expertise in studio recording practices ensures every project sounds polished and impactful.
Elevate your voiceovers today by embracing these studio recording practices. Your audience will hear the difference, and your projects will shine.


Comments